
How to carve a Halloween Jack-o-Lantern - Impressive but Easy!
How to Carve an Elaborate Pumpkin Design, Easily!!!
This easy, illustrated guide will show you, with text and accompanying photos, how you can easily turn a pumpkin in to an elaborately carved jack-o-Lantern! Anyone can follow these easy instructions to produce a professional-looking Halloween Jack-O-Lantern! If you've ever done a Paint-by-numbers Elvis on velvet as a child, then you can do this! It is much easier than you think, using my "patented" tips and tricks!
Equipment
|
|
Recipe and Directions
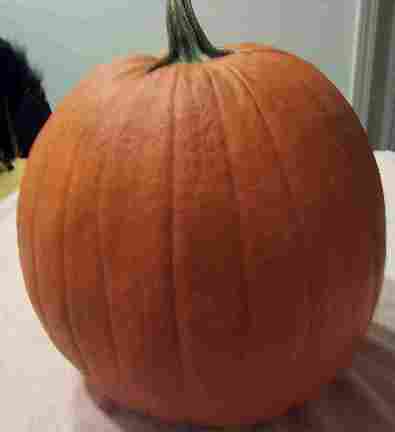 |
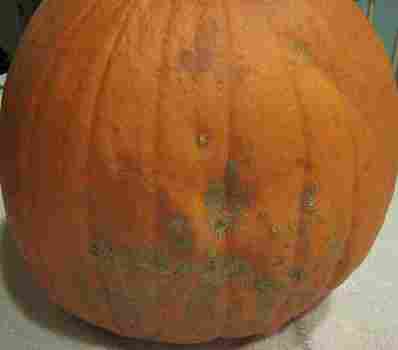
Step1 - Choose a pumpkinChoose a firm pumpkin with at least one side that has a smooth, blemish-free face. |
|||
|
It doesn't matter if one side of the pumpkin is nasty looking, just
turn that side to the wall.
|
 |
|
||
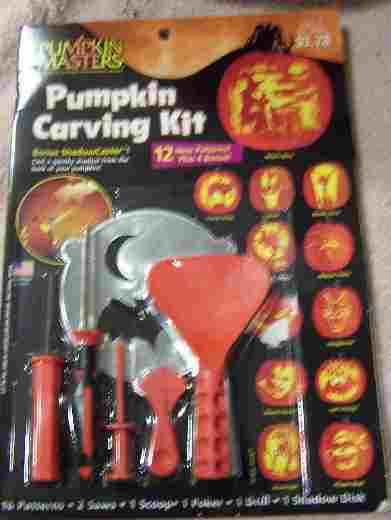 |
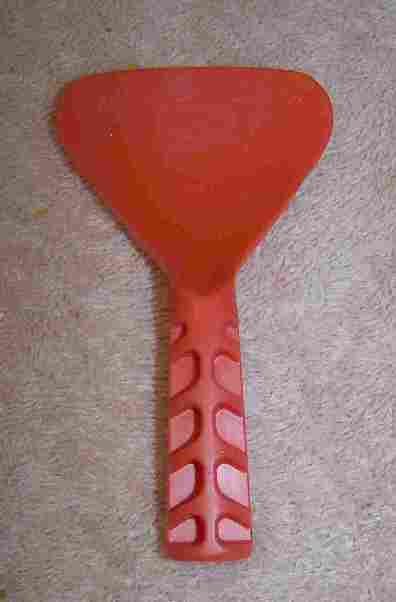
Step 2 - Get out your tools!The pumpkin carving kits that are sold at Wal-Mart, target and some grocery stores are excellent. they usually cost between $2 and $4, and have a couple dozen designs in them (meaning you could carve as many as 24 pumpkins with one kit). You can keep the kit and re-use it next year, so don't be a tightwad and just carve an insipid smiley-face pumpkin, when you can make something really amazing! The kits include all the tools needed, and they actually work better than ordinary kitchen tools! Click here to see kits, tools, books and templates for carving pumpkins
|
|||
Step 3 - Stab your Pumpkin in the Head!...with the serrated knife in the kit. Start near what will be the back side, about 3 inches from the stem and slowly work your way around the top. Before you complete the circle, cut a notch so the lid will fit securely back in the hole (see the photo below and the photo in step 7). |
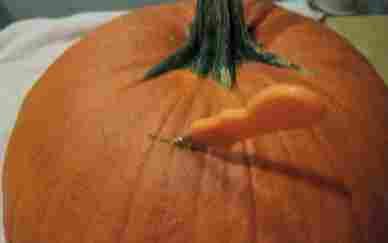 |
|||
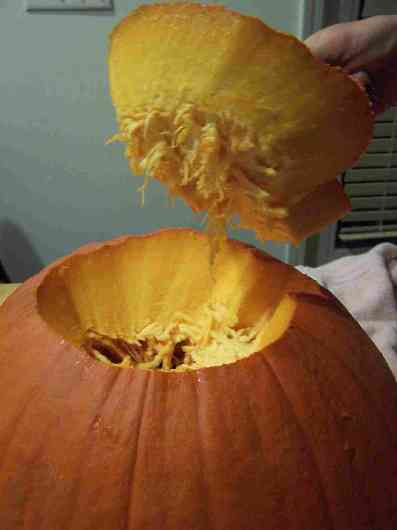 |
Step 4 - Rip your pumpkin's lid off!No, it won't scream. (you've been watching too many horror movies). But it may take a strong tug to pull it free (the stringy "brains" are still connected to the seeds on the inside). |
|||
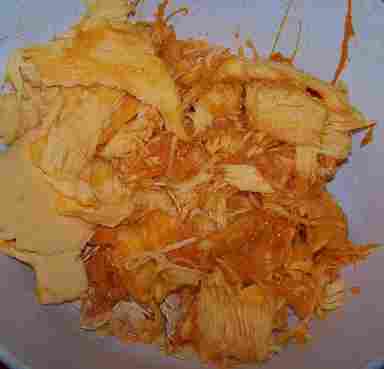
Step 5 - Plunge your hand in and pull out the pumpkin brains!Eeewwwww! I can just hear you.... Yes, stick your hand into the glop, stringy, icky stuff and try not to think of it as "pumpkin brains". I said DON'T think of it as pumpkin brains!!! Too late. Oh, well...
|
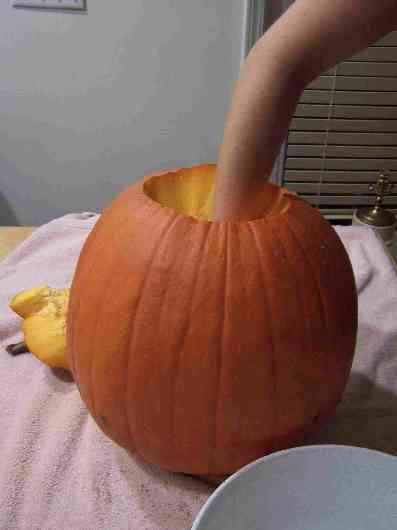 |
|||
 |
Pull as much out as you can with your hand, then.... | |||
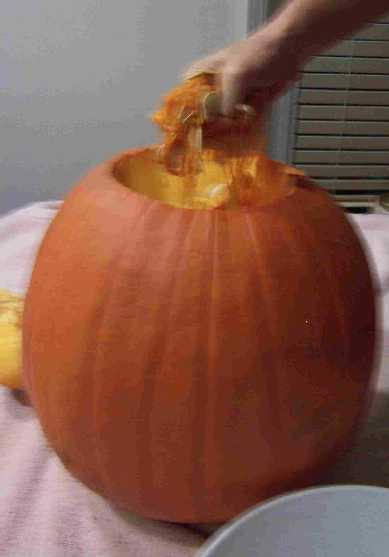
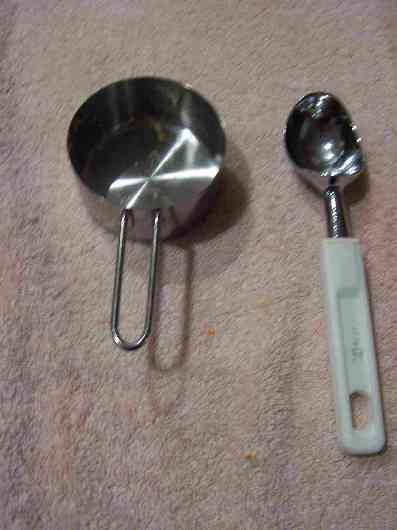
Step 6 - Scrape the inside wallsUse the scoop from your kit, or an ice cream scoop, or a metal measuring cup (the 1 cup size works well on large pumpkins, the one half cup size on smaller ones) |
  |
|||
 |
Scrape the inside walls clean, especially the front surface, as any
stringy bits will block the light! Now, have one of the children start separating the seeds from the glop. kids seem to actually enjoy this menial task. Later, we'll throw the seeds out, but it will keep the rugrats busy for a while. (Only kidding! You can roast the seeds, save them to grow a pumpkin next year or feed them to the birds.) |
|||
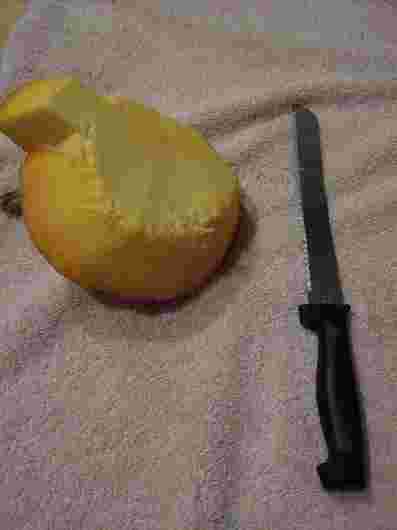
Step 7 - Cut the loose glop off from the pumpkin lidPretty self-explanatory... |
 |
|||
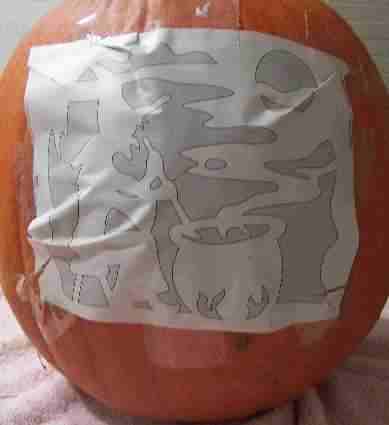 |
Step 8 - Attach the carving kit's design templateAttach the paper design to the front side of the pumpkin. Some packaging clear tape works well. I imagine duct tape would too, it seems to be good for everything (and you're supposed to have some for emergencies anyway) |
|||
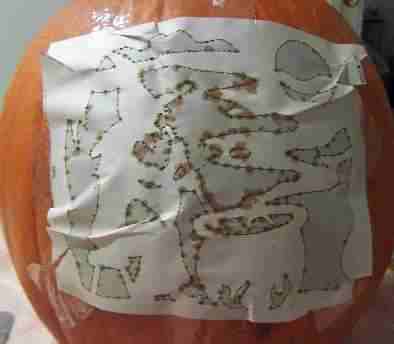
Step 9 - Mark the designUsing the small plastic poker from the kit, press through the design inside the gray side of each shape. I make holes that are about 1/8 of an inch apart.
|
 |
|||
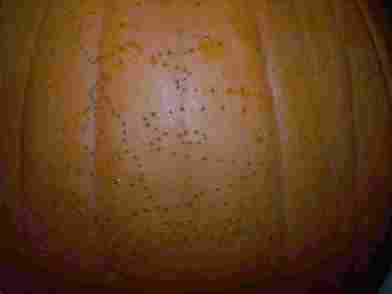 |
Step 10 - Remove the design paperTake the template off and you should be able to clearly see the outline of the design. Save the template - it is helpful to use as a reference. |
|||
Step 11 - Cut out along the dotted lines.Just like your paint-by-numbers kit, just follow the outlines - use your template to figure out where each shape starts and stops.
At right is a neat and inexpensive tool by Dremel that allows anyone do easily carve an intricate and impressive design.
|
Dremel 764-01 Pumpkin Carving KitThe Dremel Pumpkin Carving Kit features a battery operated pumpkin carving tool, powered by the Dremel 6V MiniMite Cordless Rotary Tool, and six jack-o'-lantern templates. The new Pumpkin Carving Kit makes it faster and easier to carve stunning, artistic jack-o'-lantern designs. The battery operated pumpkin carving tool strips away a partial layer of the pumpkin's surface for a translucent effect.
|
|||
The finished pumpkin won't look too impressive until you put a light or candle in it...
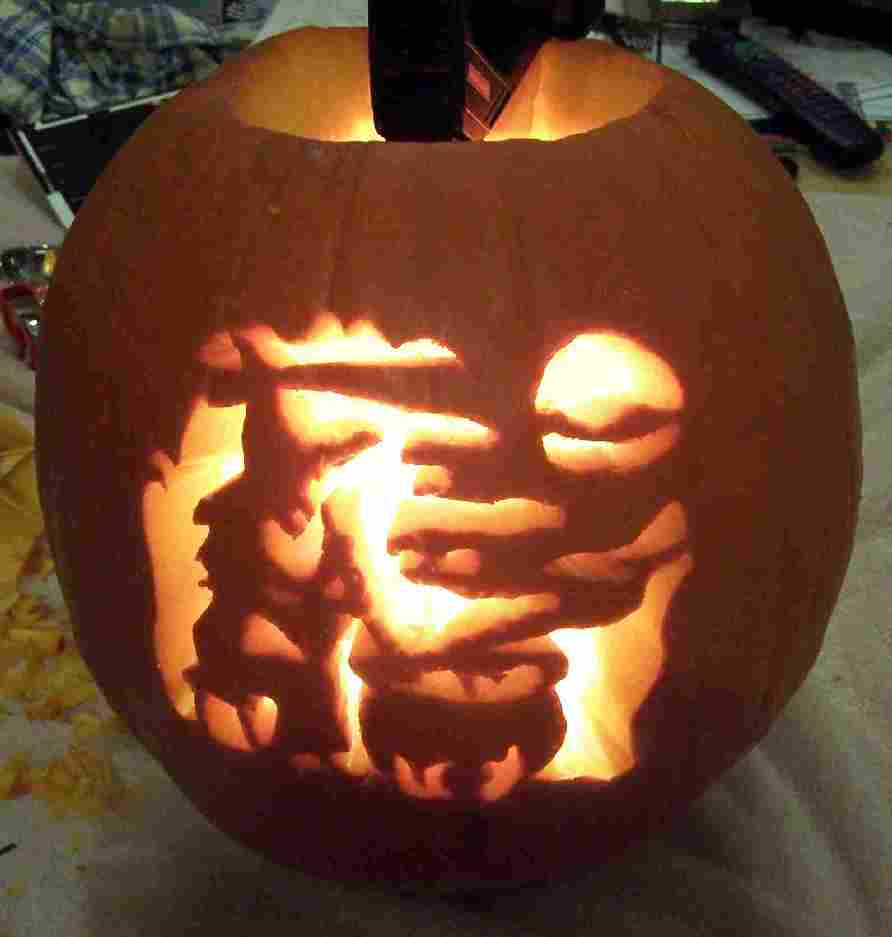
And turn off the lights! Then it's pretty amazing, huh?
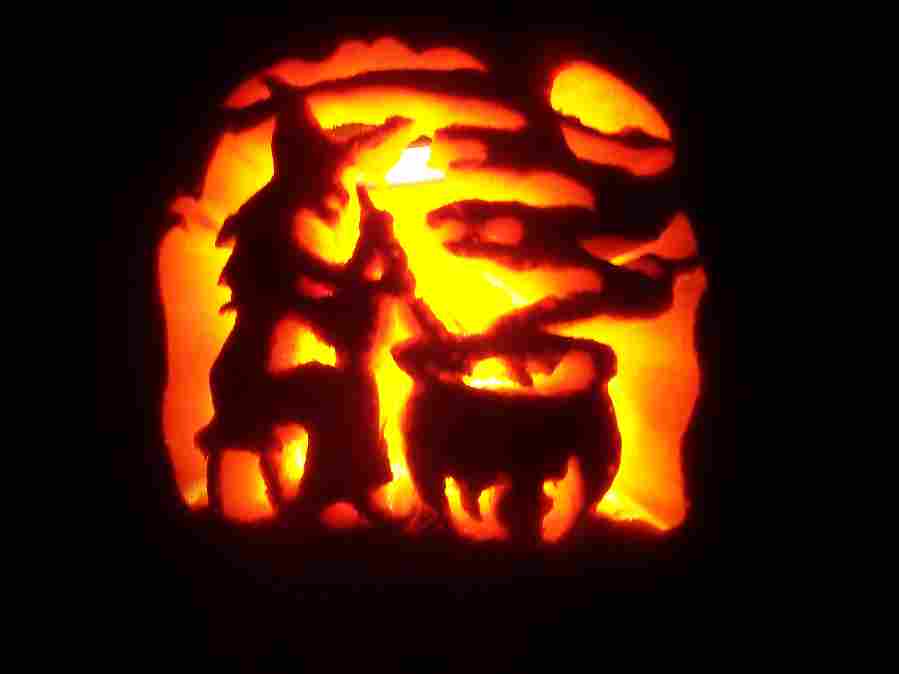
And you're done, Michelangelo! Put it in the window and wait for the applause!
Halloween Costumes
Here are some of the most popular Halloween costumes for children this year. For more choices, see our Halloween costumes pages.
- Inflatable Riding Dinosaur Costume for Adults - everyone LOVES this costume. It's a hit where ever you go!
- Harry Potter Costume Kids Plush Robe - With a hood, one for each house, Gryffindor, Hufflepuff, Slytherin, Ravenclaw, Hogwarts
- Wizard Robe Cloak Halloween costume for Kids
- Girl's Sparkle Princess Costume - In pink, for small girls
- Sew your own Halloween Costumes with Patterns from the Singer Sewing Reference Library
- Pizza Costume for Kids - A giant slice of pizza Halloween Costume for Children and Teens
- Easy Halloween Costumes for Children - Miniature patterns for 3 to 12 year old children, just enlarge and use
Find Related Information and Resources Here!
Here's the quick list to related farms for PYO, Honey, Pumpkins, Christmas trees, etc.:
You may find these websites useful!
- Local pick your own farms for apples, strawberries, raspberries, corn, tomatoes, etcr
- Farm markets and roadside stands
- Local Honey Finder
- Children's consignment sales
- Local Meat, Milk and Eggs
- Christmas Tree Farms and lots
- Road tripping and camping tips, tricks and How-to's
- Fun Factory Tours
- Venues for you event: Farms, Wineries, Orchards for your event, wedding or party
- Easter egg hunts
- Festivals: Fruit and vegetable festivals
- Winery tours and wine tastings
- Horses: rides, stables, lessons, trails
- Maple Syrup farms and sugarworks
- Bed and Breakfasts on Farms, Wineries, Ranches and Orchards
- Zombie Paintball venues
- Environmental resources
- Consumer fraud information
- Wholesale food sources
- Resources for Farmers
- Pumpkin patches
- Corn mazes
Water bath canning kit - 8 Piece Enamelware Pot with Canning kit and Rack. Canning Supplies Starter Kit
Double Donut Pumpkin Spice Coffee Pods, Single Serve Flavored Coffee for Keurig K Cups Machines,
Pumpkin Spice - Organic, 1.94-Ounce Jar, Nutmeg, Cloves, Ginger & Cinnamon, Enhances Tea, Seasoning, Kosher
Maud's Pumpkin Spice Instant Latte - 16 count Packets, Love Me Some Pumpkin Spice Latte
Pumpkin Pie Spice Blend Extract,McCormick Pure
Don't miss our page of costumes, ready made and ones you can make yourself!
And here's a book of 130 pumpkin carving stencils!
Pumpkin Carving stencils book - Over 130 Halloween jack olantern pumpkin designs. Including Witches, Cats, skulls, bats, ghosts, and so much more
More carving kits and stencils are here!
Find Other types of farms:
- Pick Your Own apples
- Christmas Tree Farms and lots
- Farm markets and roadside stands
- Local Honey
- Local Meat, Milk and Eggs
- Road trip and camping
Get the
most recent version of
the Ball Blue Book
Click here to get Halloween Costumes delivered - fast, great prices!
Click here to get Halloween Costumes delivered - fast, great prices!
Find Other types of farms:
- Pick Your Own apples
- Christmas Tree Farms and lots
- Farm markets and roadside stands
- Local Honey
- Local Meat, Milk and Eggs
- Road trip and camping
Get the
most recent version of
the Ball Blue Book