How to cook a fresh pumpkin to use in recipes! In easy illustrated steps!
How to Cook a Pumpkin to have Pumpkin Puree to use in pumpkin recipes!
Click here for a PDF print version
You probably take canned pumpkin for granted. You're there, the can is there, there's a pumpkin on the label... open it and mix it up with spices to make a pie, right. Ah, but a pumpkin pie, pumpkin soup, pumpkin bread pumpkin muffins, pumpkin spice cookies, all made from a fresh pumpkin taste so much better than the glop that was processed last year! Here's how to do it, complete instructions in easy steps and completely illustrated. And it is much easier than you think, using my "patented" tips and tricks! You can freeze it for later use, too. Note: If you want to can the cooked pumpkin: see this page!Directions for Making Pumpkin Puree from Scratch
Ingredients and Equipment
|
|
Recipe and Directions
Step 1 - Get your pie pumpkin
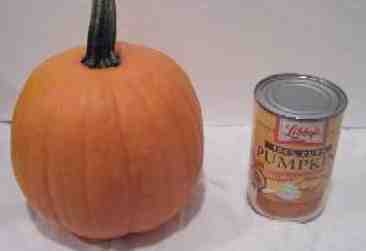 "Pie pumpkins" are smaller, sweeter, less
grainy textured pumpkins than the usual jack-o-lantern types.
grocery stores usually carry them in late September through December in
the U.S. Note: the Libby's can of cooked pumpkin is just there
for reference - it is the small can, so that gives you an idea of the size
of a typical pie pumpkin. They're only about 8 inches in diameter.
"Pie pumpkins" are smaller, sweeter, less
grainy textured pumpkins than the usual jack-o-lantern types.
grocery stores usually carry them in late September through December in
the U.S. Note: the Libby's can of cooked pumpkin is just there
for reference - it is the small can, so that gives you an idea of the size
of a typical pie pumpkin. They're only about 8 inches in diameter.
Just like selecting any squash, look for one that is firm, no bruises or soft spots, and a good orange color.
Yield: Pie pumpkins are small, usually only 6 inches in diameter. You can usually obtain about 2 or 3 cups or puree per pumpkin.
Step 2 - Prepare the pumpkin for cooking
 Wash the exterior of the pumpkin in cool or
warm water, no soap.
Wash the exterior of the pumpkin in cool or
warm water, no soap.
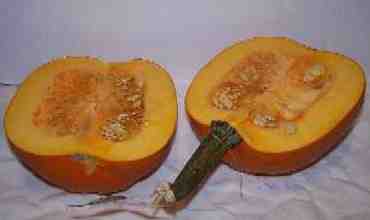
Cut the pumpkin in half. A serrated knife and a sawing motion works best - a smooth knife is more likely to slip and hurt you!
Step 3 - Scoop out the seeds...
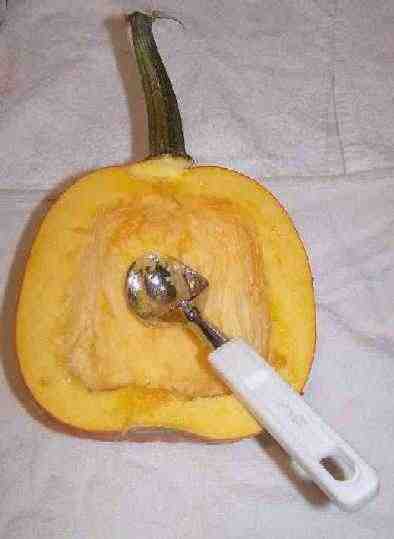 And scrape the insides. You want to
get out that stringy, dangly stuff that coats the inside surface. I
find a heavy ice cream scoop works great for this.
And scrape the insides. You want to
get out that stringy, dangly stuff that coats the inside surface. I
find a heavy ice cream scoop works great for this.
Note: SAVE THE SEEDS:
The seeds can be used either to plant pumpkins next year, or roasted to eat this year! Place them in a bowl of water and rub them between your hands. then pick out the orange buts (throw that away) and drain off the water. Spread them out on a clean towel or paper towel to dry and they're ready to save for next year's planting or roast. Click here for roasting instructions! (opens in a new window)
Step 4 - Cooking the pumpkin
There are several ways to cook the pumpkin; just choose use your preferred method. Most people have microwaves, and the use the least energy, so I'll describe that here. But others make good arguments in favor of using a pressure cooker, steaming on the stovetop or baking in the oven. I'll describe microwaving here, and at the end of this document, I've included alternative instructions to replace step 4, if you'd rather use a different method.Put it in a microwaveable bowl
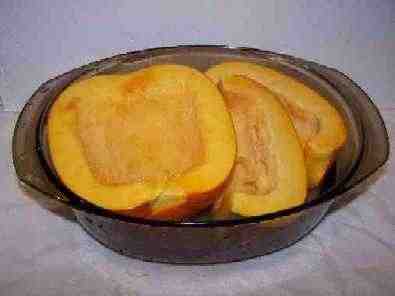 Remove the stem, and put the pumpkin into a
microwaveable. You may need to cut the pumpkin further to make it fit.
The fewer the number of pieces, the easier it will to scoop out the cooked
pumpkin afterwards.
Remove the stem, and put the pumpkin into a
microwaveable. You may need to cut the pumpkin further to make it fit.
The fewer the number of pieces, the easier it will to scoop out the cooked
pumpkin afterwards.
Put a couple of inches of water in the bowl, cover it, and put in the microwave.
Step 5 - Cook the pumpkin until soft
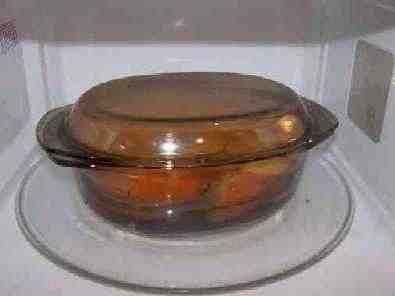 Cook for 15 minutes on high, check to see if
it is soft, then repeat in smaller increments of time until it is soft
enough to scoop the innards out. Normally it takes 20 or 30 minutes
in total.
Cook for 15 minutes on high, check to see if
it is soft, then repeat in smaller increments of time until it is soft
enough to scoop the innards out. Normally it takes 20 or 30 minutes
in total.
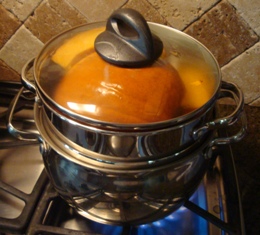
Note: You can also cook it on the stovetop; it takes about the same
length of time in a steamer. I use a double pot steamer, but you
could use an ordinary large pot with a steamer basket inside it!: 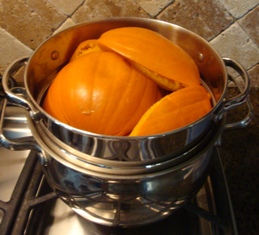
Step 6 - Scoop out the cooked pumpkin
Whether you cook the pumpkin on the stove, microwave, or even the
oven, once it is cooked until it is soft, it is easy to scoop out the
guts with a broad, smooth spoon, (such as a
tablespoon). Use the spoon to gently lift and scoop the cooked pumpkin out of the skin.
It should separate easily an in fairly large chucks, if the pumpkin is
cooked enough.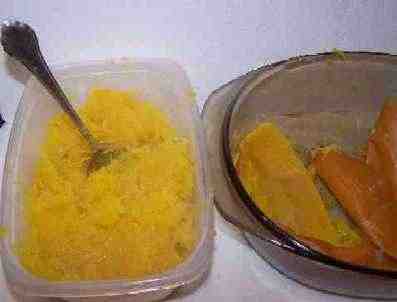
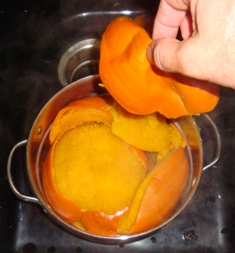 Many
times the skin or rind will simply lift off with your fingers (see the
photo at left) . I'll bet you didn't realize making your own
pumpkin glop... err, "puree" was this easy!
Many
times the skin or rind will simply lift off with your fingers (see the
photo at left) . I'll bet you didn't realize making your own
pumpkin glop... err, "puree" was this easy!
Note: there are many varieties of pumpkin and some make better pies that other (due to sugar content, flavor, texture and water content. Drier, sweeter, fine-grained pies; the small (8" across) ones called "pie pumpkins" are best. If your pumpkin is more watery than the puree in the photo at right (there should not be any free water), you may want to let it sit for 30 minutes and then pour off any free water. That will help prevent your pie from being too watery!
Tip from a visitor: "I make my own pumkin pies from scratch all the time. To eliminate watery pumpkin I strain my pureed pumpkin through a cloth overnight. If I use frozen pumpkin I do the same again as it thaws out. It works great and my pies cook beautifully."
Step 7 - Puree the pumpkin
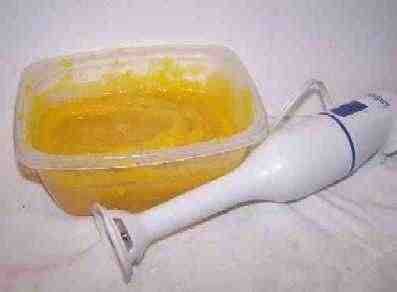 To get a nice, smooth consistency, I use a
Pillsbury hand blender. A regular blender works, too (unless you
made a few frozen daiquiris and drank them first..). Or even just a hand
mixer with time and patience.
To get a nice, smooth consistency, I use a
Pillsbury hand blender. A regular blender works, too (unless you
made a few frozen daiquiris and drank them first..). Or even just a hand
mixer with time and patience.
With the hand blender, it just takes 2 or 3 minutes!
Step 8 - Done with the pumpkin!
The pumpkin is no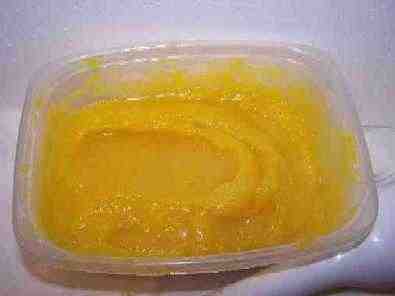 w cooked and ready for the
pie recipe. Get the frozen daiquiris out from step 7 and take a
break! :)
w cooked and ready for the
pie recipe. Get the frozen daiquiris out from step 7 and take a
break! :)
It's ready to pop in the fridge or freezer (just pack it containers, like Ziploc bags or plastic containers, exclude as much air as you can, and freeze it!)
It is not suitable for home canning - See this page for the safety reasons why.
Start making tasty treats!
how about ...
-
How to make a pumpkin pie and How to make a flakey pie crust
-
How to make Pumpkin Bread
-
How to make pumpkin soup
-
How to make roasted pumpkin seeds
Alternative Cooking methods for step 4
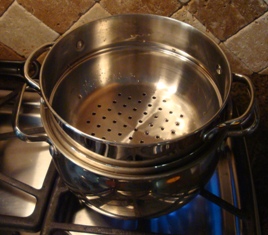
If you don't have a microwave, or prefer another method, try these:Stovetop steaming - Place your steaming basket or grid in the bottom of a large pot. Put enough water so it won't boil dry in 20 minutes, and yet is not so high that the pumpkin is touching the water level. You may need to add more water during the cooking. Add the pumpkin prepared in step 3, and get the steamer going. The cooking time is only between 8 and 12 minutes, depending on the range (gas or electric), and the pumpkin literally falls off the skin.
Pressure cooker - Place your grid in the bottom of the pressure cooker. If your pressure cooker came with directions, follow those for pumpkin and/or winter squash, like butternut squash. If, like most people, you've long since lost the directions, try this: Add enough water to just touch the bottom of the grid or shelf that you will place the pumpkin on. Add the pumpkin prepared in step 3, put the lid with the gasket, the weight and anything else your cooker requires in place, and turn the heat on high. Once it starts hissing, turn it to medium or medium high. The cooking time should only be about 10 minutes, and the pumpkin should literally fall out of its skin.
Oven - You can also bake the prepared pumpkin in the oven, just like a butternut squash. This method takes the longest. Just put the prepared pumpkin in an ovenproof container (with a lid), add about 3 cups of water to help prevent it from drying out and pop it in an 350 F (175 C) oven. It normally takes about 45 minutes to an hour; just test it periodically by sticking it with a fork to see if it is soft!Feedback
A visitor writes on October 11, 2008: "I've
always wanted to try cooking with actual pumpkins as opposed to the
canned stuff. I did so today. It was a lot of work, granted, but
everything I have made so far has been outstandingly delicious. Thank
you for your tips, directions, guidance, and recipes! My freezer is full
of pumpkin puree that's waiting for me to find another delicious pumpkin
recipe!"
|
Click here for related items on Amazon Click here for related items on Amazon |
Complete Water Bath Canner KitThis is the same type of standard canner that my grandmother
used to make everything from pumpkinauce to jams and jellies to tomato and
spaghetti sauce. |
||
|
Click here for this item on Amazon |
|
||
|
|
Lids, Rings, Jars, mixes, pectin, etc.Need lids, rings and replacement jars? Or pectin to make jam, spaghetti sauce or salsa mix or pickle mixes? Get them all here, and usually at lower prices than your local store! |


Halloween Costumes
Here are some of the most popular Halloween costumes for children this year. For more choices, see our Halloween costumes pages.
Wizard Robe Cloak Halloween costume for Kids
Girl's Sparkle Princess Costume - In pink, for small girls
Sew your own Halloween Costumes with Patterns from the Singer Sewing Reference Library
Pizza Costume for Kids - A giant slice of pizza Halloween Costume for Children and Teens
Find Related Information and Resources Here!
Here's the quick list to related farms for PYO, Honey, Pumpkins, Christmas trees, etc.:
You may find these websites useful!
Local pick your own farms for apples, strawberries, raspberries, corn, tomatoes, etcr
Farm markets and roadside stands
Road tripping and camping tips, tricks and How-to's
Venues for you event: Farms, Wineries, Orchards for your event, wedding or party
Festivals: Fruit and vegetable festivals
Winery tours and wine tastings
Horses: rides, stables, lessons, trails
Maple Syrup farms and sugarworks
Bed and Breakfasts on Farms, Wineries, Ranches and Orchards
Water bath canning kit - 8 Piece Enamelware Pot with Canning kit and Rack. Canning Supplies Starter Kit
Double Donut Pumpkin Spice Coffee Pods, Single Serve Flavored Coffee for Keurig K Cups Machines,
Pumpkin Spice - Organic, 1.94-Ounce Jar, Nutmeg, Cloves, Ginger & Cinnamon, Enhances Tea, Seasoning, Kosher
Maud's Pumpkin Spice Instant Latte - 16 count Packets, Love Me Some Pumpkin Spice Latte
Pumpkin Pie Spice Blend Extract,McCormick Pure
Don't miss our page of costumes, ready made and ones you can make yourself!
And here's a book of 130 pumpkin carving stencils!
Pumpkin Carving stencils book - Over 130 Halloween jack olantern pumpkin designs. Including Witches, Cats, skulls, bats, ghosts, and so much more
More carving kits and stencils are here!
Find Other types of farms:
Farm markets and roadside stands
Get the
most recent version of
the Ball Blue Book
Click here to get Halloween Costumes delivered - fast, great prices!
Click here to get Halloween Costumes delivered - fast, great prices!
Find Other types of farms:
Farm markets and roadside stands
Get the
most recent version of
the Ball Blue Book